Stepping out of Aruba’s hard, white sun and into Guadirikiri Cave feels like walking beneath a limestone cathedral whose roof has been opened to the sky. The cave sits inside Arikok National Park on the island’s windward coast, and its photography appeal is wonderfully specific: pale karst, proper dark recesses, and shafts of daylight dropping through openings in the roof. The official Aruba tourism guide describes the cave as having two chambers and extending about 100 feet, while other Aruba tourism material describes a longer system of roughly 490 feet, depending on which passages are counted. For photos, the two main chambers are the useful visual landmarks. Aruba’s official cave guide confirms the two-chamber layout, the roof openings and the bats in the darker sections.
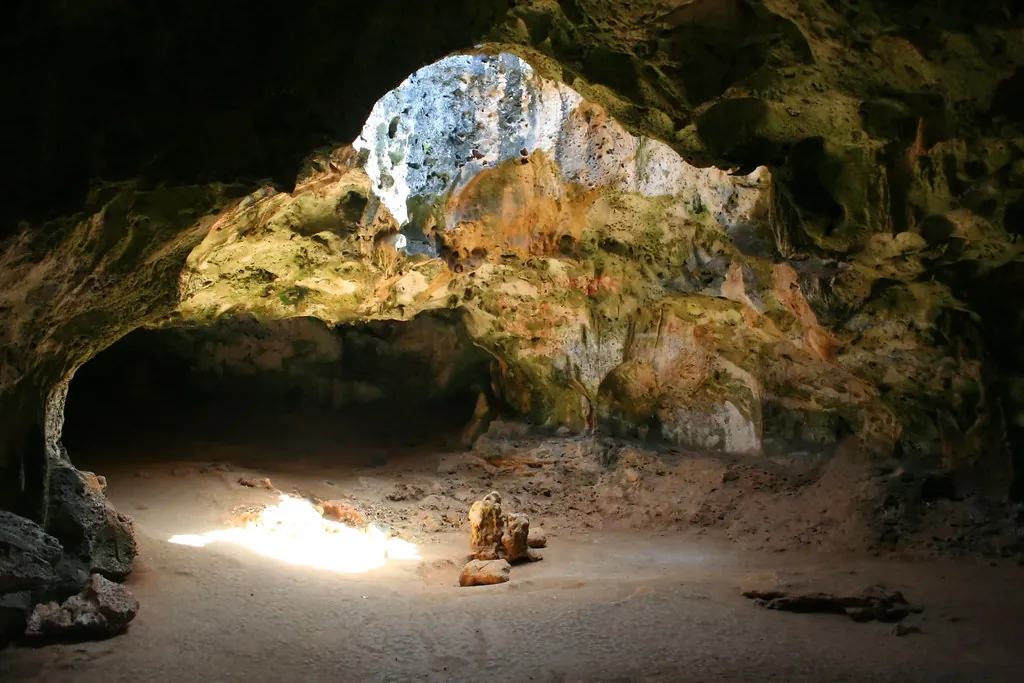
If you have come hunting for Quadirikiri Cave photos, you will quickly discover that spelling varies between Guadirikiri, Quadirikiri and Quadiriki. I use Guadirikiri here because that is the spelling used for this page, but the alternate forms matter when you are checking maps, tour descriptions or photo archives. The visual character stays the same: a cave shaped by limestone, openings in the ceiling, and sunlight that can turn an otherwise subdued wall into something almost theatrical.
Chamber One: Entering the Sunlit Limestone Dome
The first chamber is where your eyes recover from Aruba’s daylight. Give them a moment. The entrance lets in enough ambient light to reveal the rough floor and the broad limestone surfaces, yet the corners retreat quickly into shadow. This is the easier place to start photographing because the contrast is gentler and you can work out your camera settings before reaching the famous roof openings.
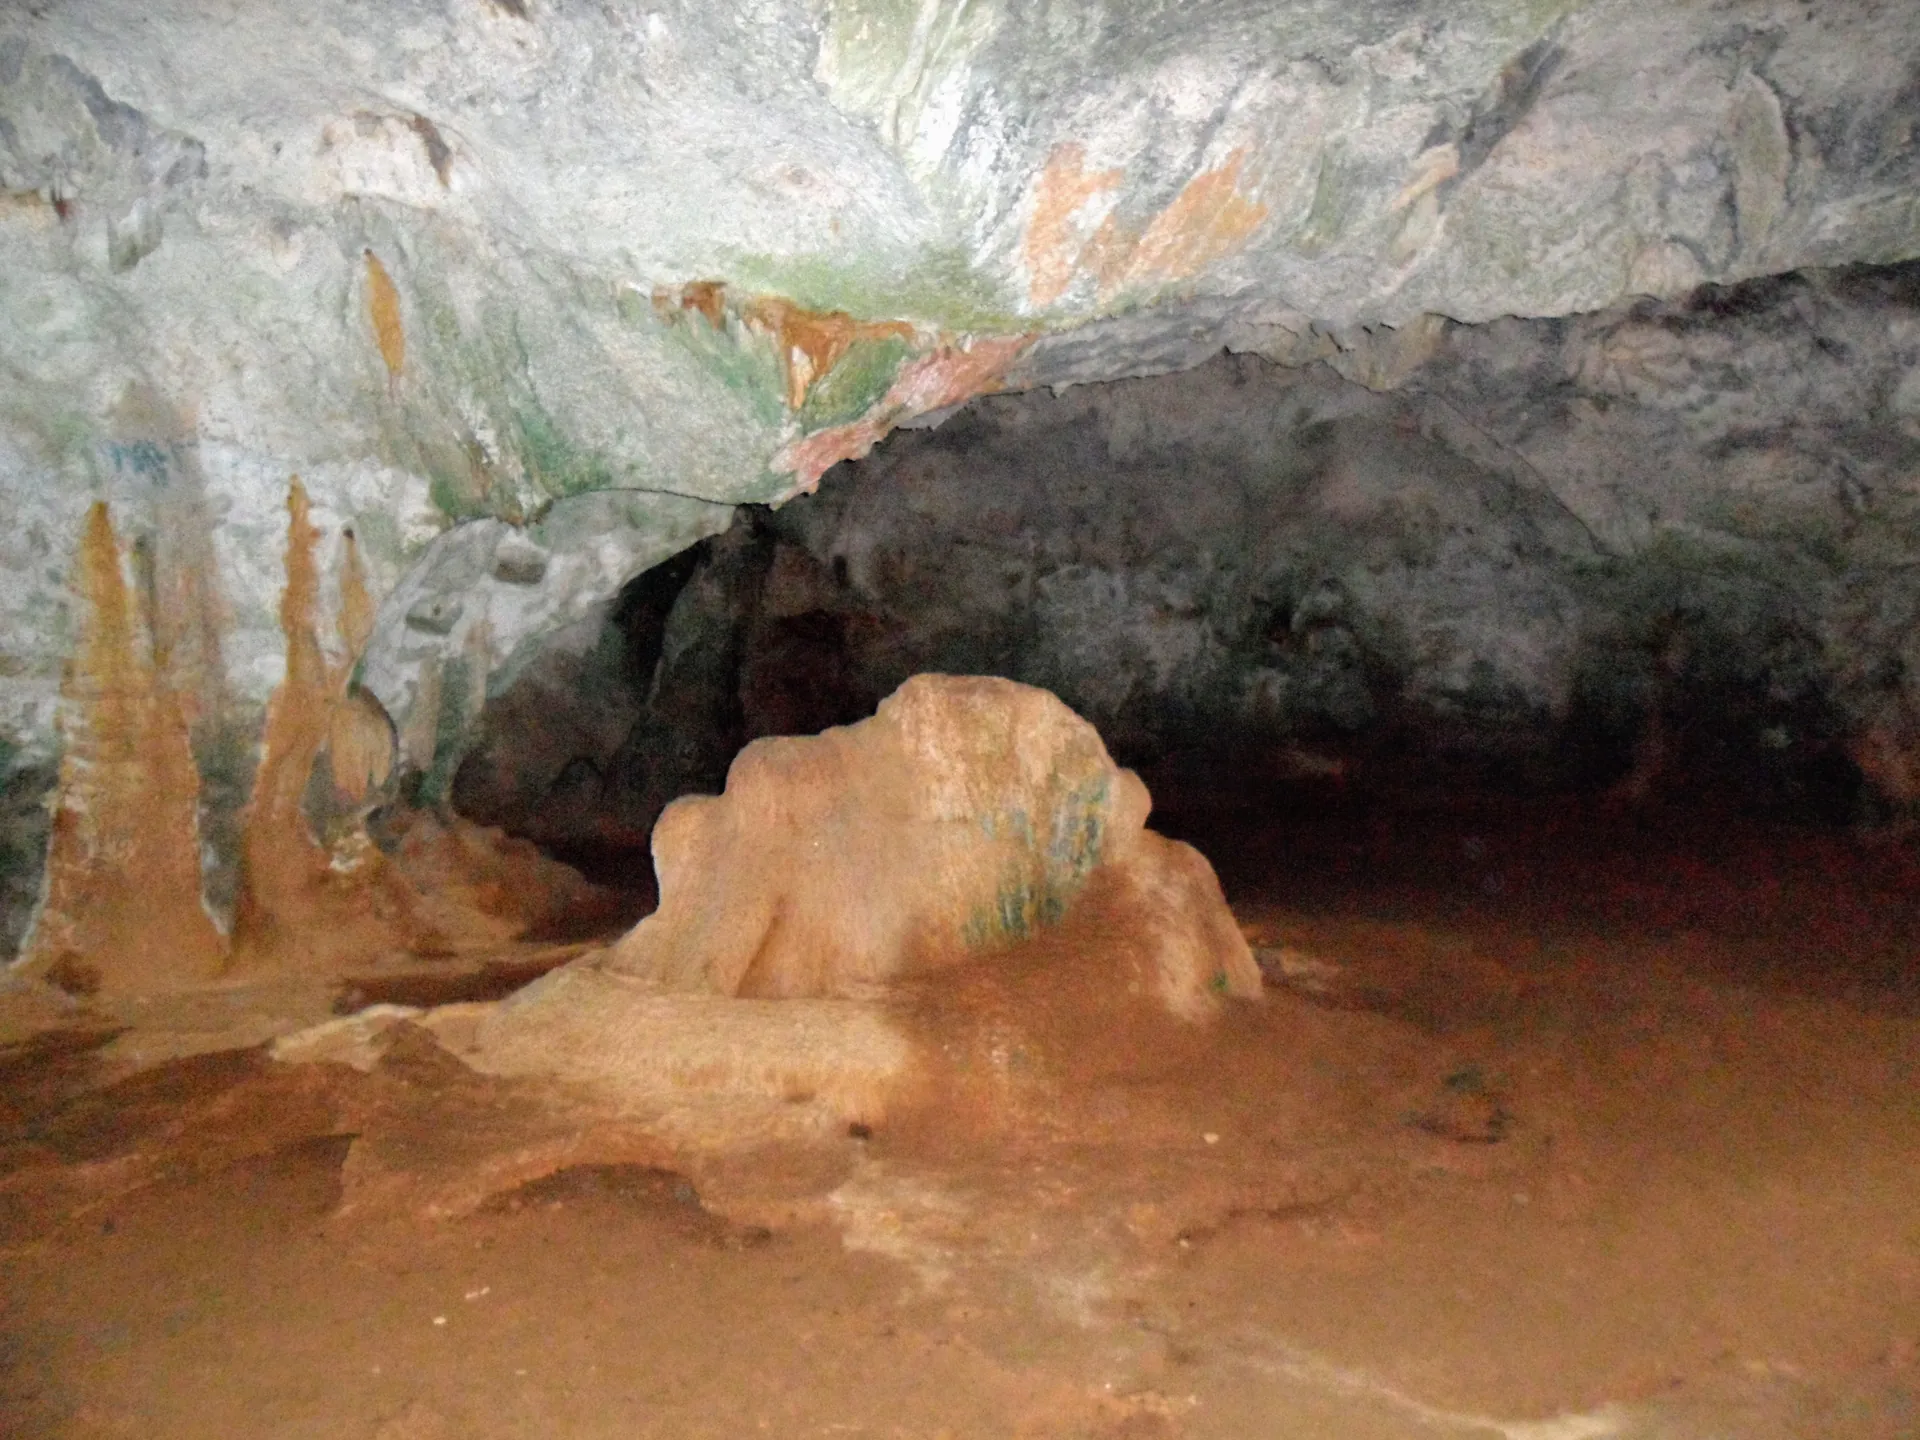
Study the ceiling as you walk rather than keeping your camera glued to the floor. The rock is weathered into pockets, ledges and honeycombed textures, and those details become useful foreground material once you reach Chamber Two. A wide composition from low down can make the ceiling feel enormous, while a portrait-oriented frame can pull the eye from the cave floor towards the darker roof.
What the eye sees
Chamber One has softer ambient illumination, so limestone texture remains easier to read across the frame. It is a good place for environmental portraits, entrance shots and a few test exposures before you chase the light shafts.
What the camera sees
Modern phones can recover plenty of shadow detail here. Tap the brightest rock area to control exposure, then lower exposure slightly if the highlights begin to wash out. On a dedicated camera, RAW capture gives you more room to recover the darker walls later.
Keep your feet in mind while you compose. The cave floor is uneven, and a beautiful low angle is not worth an ankle twisted over limestone. Closed-toe shoes with a decent sole make much more sense than beach sandals, even if the latter are still hanging from your morning coffee run.
Chamber Two: The Roof Holes and Famous Light Shafts
Chamber Two is where the Quadirikiri Cave Aruba photos become recognisable. Circular openings in the roof let tropical sunlight plunge into the darkness, creating bright shafts against the surrounding karst. The effect changes from minute to minute as the sun moves, and the strongest photographs usually depend more on timing and patience than on expensive glass.
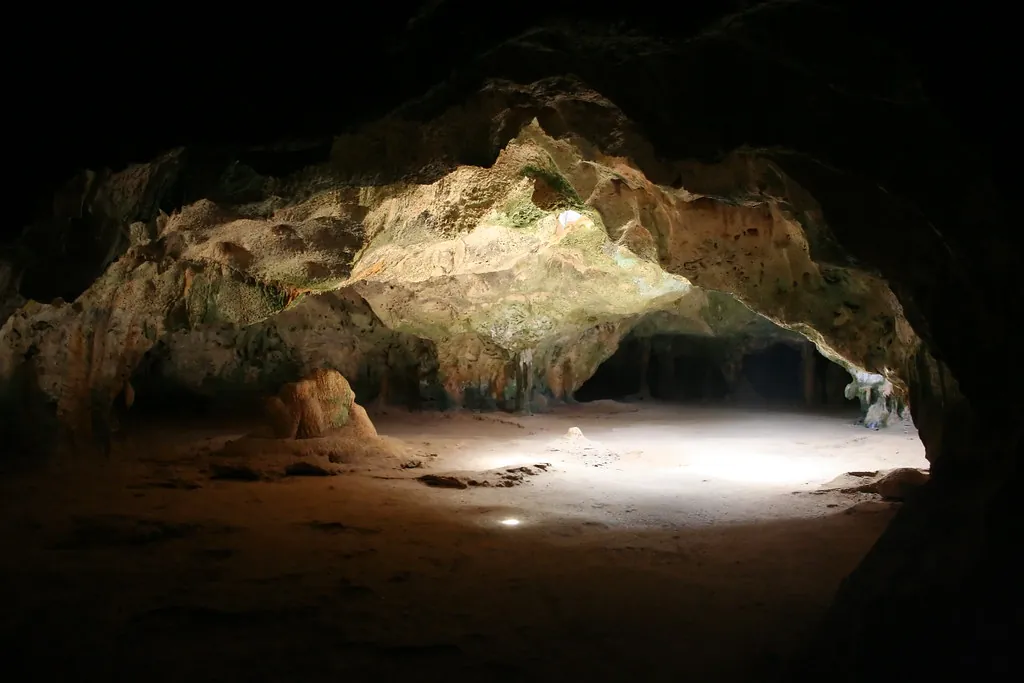
Stand where the beam crosses the floor rather than directly underneath the opening. That small change gives you depth: bright limestone in the foreground, the beam cutting through the middle of the frame, then dark recesses beyond it. If another visitor happens to walk through the shaft, wait a few seconds before taking the frame. A human figure can give the cavern scale, but it should never become the reason someone else has to stop enjoying the cave.
The best light-beam photograph usually comes from standing just outside the brightest patch, where the sun, limestone and proper dark all occupy the same frame.
Aruba’s tourism authority describes the cave’s two chambers as being illuminated by sunlight entering through roof holes, while its broader cave guide confirms that hundreds of harmless bats occupy the darker sections. That contrast is the whole visual trick: the eye travels from the bright opening to the illuminated dust and finally into rock that the camera can barely see. The official Quadirikiri Cave guide is useful background before you visit.
When the Natural Light Beams Work Best
Mid-morning into midday is the useful starting point for photographers chasing vertical beams. The sun climbs high enough for direct light to reach through the roof openings, while the cave remains within the park’s daytime access window. Aruba Tourism describes Guadirikiri’s chambers as illuminated by sunlight through the roof openings, with one Aruba Tourism article noting that around midday, when the sun is more directly overhead, the cave can take on a strong golden illumination. The exact appearance shifts with season, cloud cover and the position of the sun, so treat a particular clock time as a field tip rather than a guarantee.
Around midday is a sensible target if your priority is the strongest roof-light effect, although the shaft can move from one patch of floor to another while you are there. Give yourself time to watch before shooting. The first frame is often the one where the camera is still guessing what you meant.
Marlowe’s note: Let your eyes adjust before you decide the cave is too dark. The back of Chamber Two is properly black compared with the entrance, and your vision will pick out shapes that your phone initially misses.
For exact access information, check the Arikok National Park website before setting off. Aruba’s official tourism information currently lists cave access during national park hours, 8:00 AM to 4:00 PM. Weather matters for the wider park too, particularly if you are combining the cave with exposed trails, so the Meteorological Department of Aruba is the sensible place to check current forecasts and advisories.
For a fuller timing breakdown, including morning light, heat and seasonal considerations, continue to Best Time to Visit Guadirikiri Cave. The Visitor Rules & Guidelines page covers the practical restrictions that matter once you are inside.
Smartphone vs. DSLR: What You Can Actually Capture
A good modern phone can make surprisingly convincing Guadirikiri Cave photos, particularly in Chamber One and around the softer edges of the light shafts. Computational photography can stack exposures and pull detail from shadows that would have looked almost black to an older phone. The catch is movement: if the phone combines several frames, a moving person or bat can produce odd edges and blur.
A DSLR or mirrorless camera gives you greater control when the roof beam becomes intensely bright against the dark limestone. A wide lens in the 16–35mm range is useful for chamber-scale compositions, while a standard zoom can isolate the shaft, ceiling texture or a person standing at a safe distance. You do not need an enormous lens collection. One dependable wide lens and a steady hand can carry the visit.
Phone settings
- Use the widest lens that keeps the edges of the cave natural.
- Tap near the bright beam, then reduce exposure slightly if highlights clip.
- Use Night mode only when people are still, because movement can smear.
- Keep the lens clean. Cave dust and fingerprints make backlit scenes hazy.
Camera settings
- Start around ISO 800–1600 and adjust according to the available light.
- Try f/4 to f/5.6 for a balance between light and useful depth of field.
- Use roughly 1/30–1/60 sec for a still subject, faster if someone is moving.
- Shoot RAW when available, especially for scenes with bright shafts and black rock.
Those numbers are starting points, not cave law. If the beam is blown white, lower ISO or shorten the shutter speed; if the walls disappear into featureless black, open the aperture or raise ISO. Watch the histogram if your camera has one. Protect the highlights first, because a completely white sunbeam has no texture waiting to be recovered.
How to Compose Light Against Dark Karst
The temptation is to point straight up at the roof holes, fire off a frame and move on. Resist that urge. The openings are more interesting when the photograph shows what they do to the chamber beneath them.
- Use the cave wall as a dark border around the brightest shaft.
- Place a person well away from the bats to give the cavern scale.
- Turn the camera vertically when the beam reaches from ceiling to floor.
- Try a low viewpoint, but only from firm ground where you are not blocking other visitors.
- Leave some black space in the frame. The darkness is part of the photograph.
- Expose for the brightest part of the shaft rather than the deepest recess.
There is a lovely cathedral trick here: the roof opening becomes your oculus, the beam becomes the stained glass, and the rough limestone does the rest. You do not need to manufacture atmosphere with a torch. The cave has already done the work for you.
Bat-Safe Photography Comes Before the Perfect Frame
Hundreds of small insect-eating bats roost in the darker recesses of Guadirikiri Cave. Aruba’s tourism information describes them as harmless, which is useful context, but harmless does not mean available for close-up photography. Give them space and keep your attention on the limestone rather than trying to force a wildlife portrait.
Flash is the hard line. Do not use a camera flash around roosting bats. A burst of white light can disturb animals that have deliberately chosen the dark, and it also destroys the natural quality you came to photograph. If you need a flashlight to find your footing, point the beam down towards the ground rather than sweeping it across ceilings and crevices. Keep phone-screen brightness low as well.
Photograph the light, not the bats. The cave gives you enough drama without asking its residents to perform.
For a wider discussion of responsible cave behaviour, see Aruba Cave Etiquette: Bats, Formations, and Responsible Visiting. It covers the small habits that matter across Aruba’s cave sites, including keeping quiet near wildlife and leaving formations untouched.
Flash, Tripods and Photo Etiquette
Flash photography around bats should be treated as prohibited, and artificial white light should stay pointed towards the floor when it is needed for safe movement. Tripods require a little more judgement. A full-size tripod can occupy a surprising amount of the already awkward floor space, create a trip hazard and make it harder for other visitors to pass. If park staff ask you to put one away, do it immediately.
There is also a social side to cave photography. Do not stand in the main light shaft for ten minutes while a queue forms behind you, and do not ask strangers to move simply because they have wandered into your composition. Take the frame, step aside, then have another go when the space clears. The cave is public, your photograph is not.
Touching limestone formations is poor practice because oils and repeated contact alter surfaces that formed over very long periods. Stay on established routes and follow ranger instructions, especially if a section has been closed to protect bats or the cave itself. The official Arikok National Park guidance is the right reference for current park rules rather than an old social-media post or a tour description copied five years ago.
Mind the Floor Before You Mind the Exposure
Guadirikiri is a photography site only if you can stand safely enough to enjoy it. The limestone floor is rocky and uneven, and the change from brilliant exterior daylight to a dim interior makes depth harder to judge. Put the camera strap across your body before you move, keep one hand free where the terrain demands it, and stop walking while you change settings.
| What to Bring | Practical Choice | Why It Helps |
|---|---|---|
| Footwear | Closed-toe hiking shoes or grippy trainers | Uneven limestone is a poor match for loose sandals |
| Water | At least one litre per person | Cave humidity and desert heat drain energy quickly |
| Lighting | Small handheld torch or phone light | Useful for dark connecting passage without disturbing bats |
| Camera support | Steady hands or lightweight beanbag | Tripods are cumbersome on uneven paths; low-light modes work best |
| Lens choice | Wide-angle lens (16–24mm equivalent) | Captures high ceiling openings and cavern depth |
| Sun protection | Hat, sunscreen and sunglasses | Stepping from dark cave into glaring desert light requires eye protection |
If you are making a wider Arikok day of it, the Arikok National Park Packing List & Desert Safety guide covers the heat, water, footwear and exposed terrain that sit outside this cave-specific page.
How the Cave Fits Into Arikok National Park
Guadirikiri is one stop within a much larger protected landscape. Arikok National Park covers roughly a fifth of Aruba, with caves, rugged limestone country, coastal terrain and other natural sites spread across the park. A cave photograph can make the island look entirely subterranean, but step outside and the landscape changes quickly to dry, sunlit terrain.
That is why the cave works particularly well as part of a slow morning rather than a frantic photo stop. Give the chamber time, then continue into the park while the day is still manageable. If you want the wider picture of Guadirikiri, Fontein Cave and the park’s other sites, the Arikok National Park & Nearby Caves guide brings those pieces together without repeating the photography advice here.
For transport details, including driving, rental-car considerations and reaching the cave within the park, use How to Get to Guadirikiri Cave. If you are joining a guided excursion, the Tickets & Tours page covers the booking side separately.
What Your Quadirikiri Cave Photos Should Remember
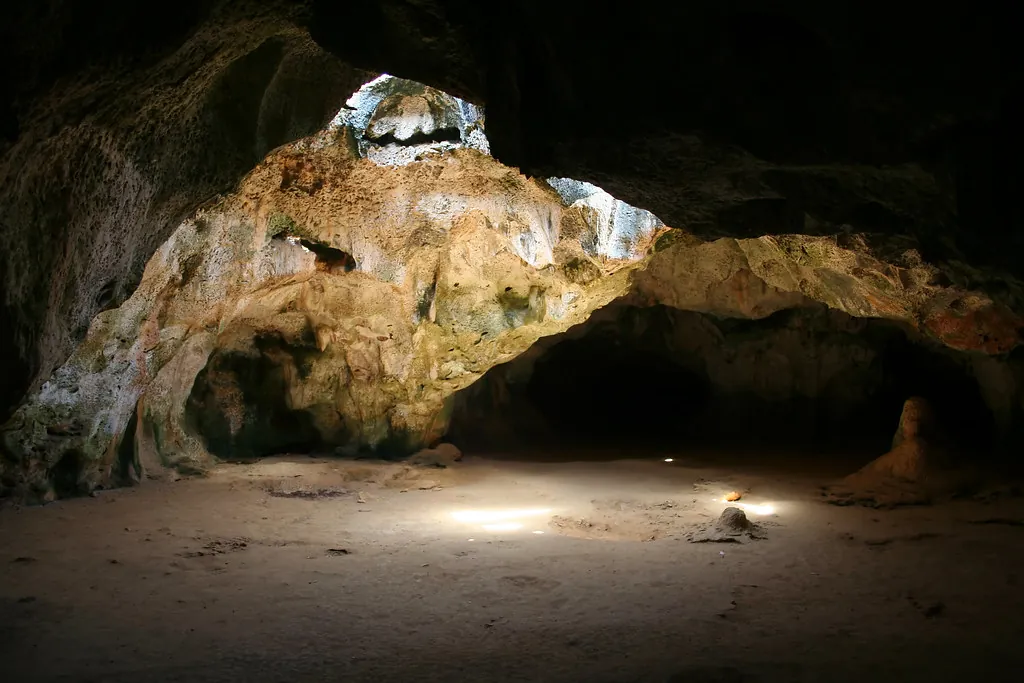
The most memorable frame is usually the one that explains the cave rather than merely recording it. Include the roof opening and the darkness beneath it. Let the rough limestone frame the sunlight. Give the beam enough empty space to breathe. If someone happens to walk through the scene, use them for scale and then let them carry on.
A phone can capture the broad mood, while a mirrorless or DSLR gives you more control over the difficult contrast. Mid-morning is the sensible light window to try, but the sun does not read your itinerary, so watch the beam and move when the composition changes. Keep flash away from bats, keep artificial light pointed at the floor, and treat the uneven rock as part of the environment rather than an inconvenience to rush across.
Those are the Quadirikiri Cave facts that matter most when you arrive with a camera: the cave is inside Arikok National Park, the roof openings create its signature shafts, the darker recesses hold bats, and the visual drama comes from the tension between intense Caribbean daylight and limestone shadow. The official Aruba tourism authority remains a useful source for the cave’s basic structure and access, while Arikok National Park is the place to check current rules before your visit. Official Aruba cave information and Arikok National Park are worth saving before you leave the hotel.
A Photographer’s Final Checklist
- Arrive during the park’s daytime access period, currently listed as 8:00 AM to 4:00 PM by Aruba’s official tourism information.
- Aim for mid-morning if your priority is the strongest roof-light effect.
- Give your eyes time to adjust before judging the exposure.
- Meter for the bright shaft and recover darker limestone in post-processing where possible.
- Use a wide lens for the chamber, then change position rather than simply zooming.
- Keep flash switched off around bats.
- Point necessary torch or phone light towards the ground.
- Keep noise and movement low near the darker roosting areas.
- Use tripods only where current park guidance permits them and where they do not obstruct the route.
- Wear shoes that can handle uneven limestone.
- Leave formations untouched and stay on the established route.
- Check the Visitor Rules & Guidelines and the Best Time to Visit Guadirikiri Cave page before setting out.
And pack water. Aruba has a talent for making a short cave visit turn into half a day outdoors, especially once you start stopping for every promising patch of light. A chipped enamel mug and a coffee afterwards would be entirely in keeping with the occasion.